How to Add Camera Capture and Mobile Photo Upload to Native Framer Forms
Let visitors snap 1–6 photos with a live rear or front camera in your native Framer form, compressed in the browser and uploaded to FramerSend storage or your own bucket.

Dong Trinh
Lead Architect at FramerSend
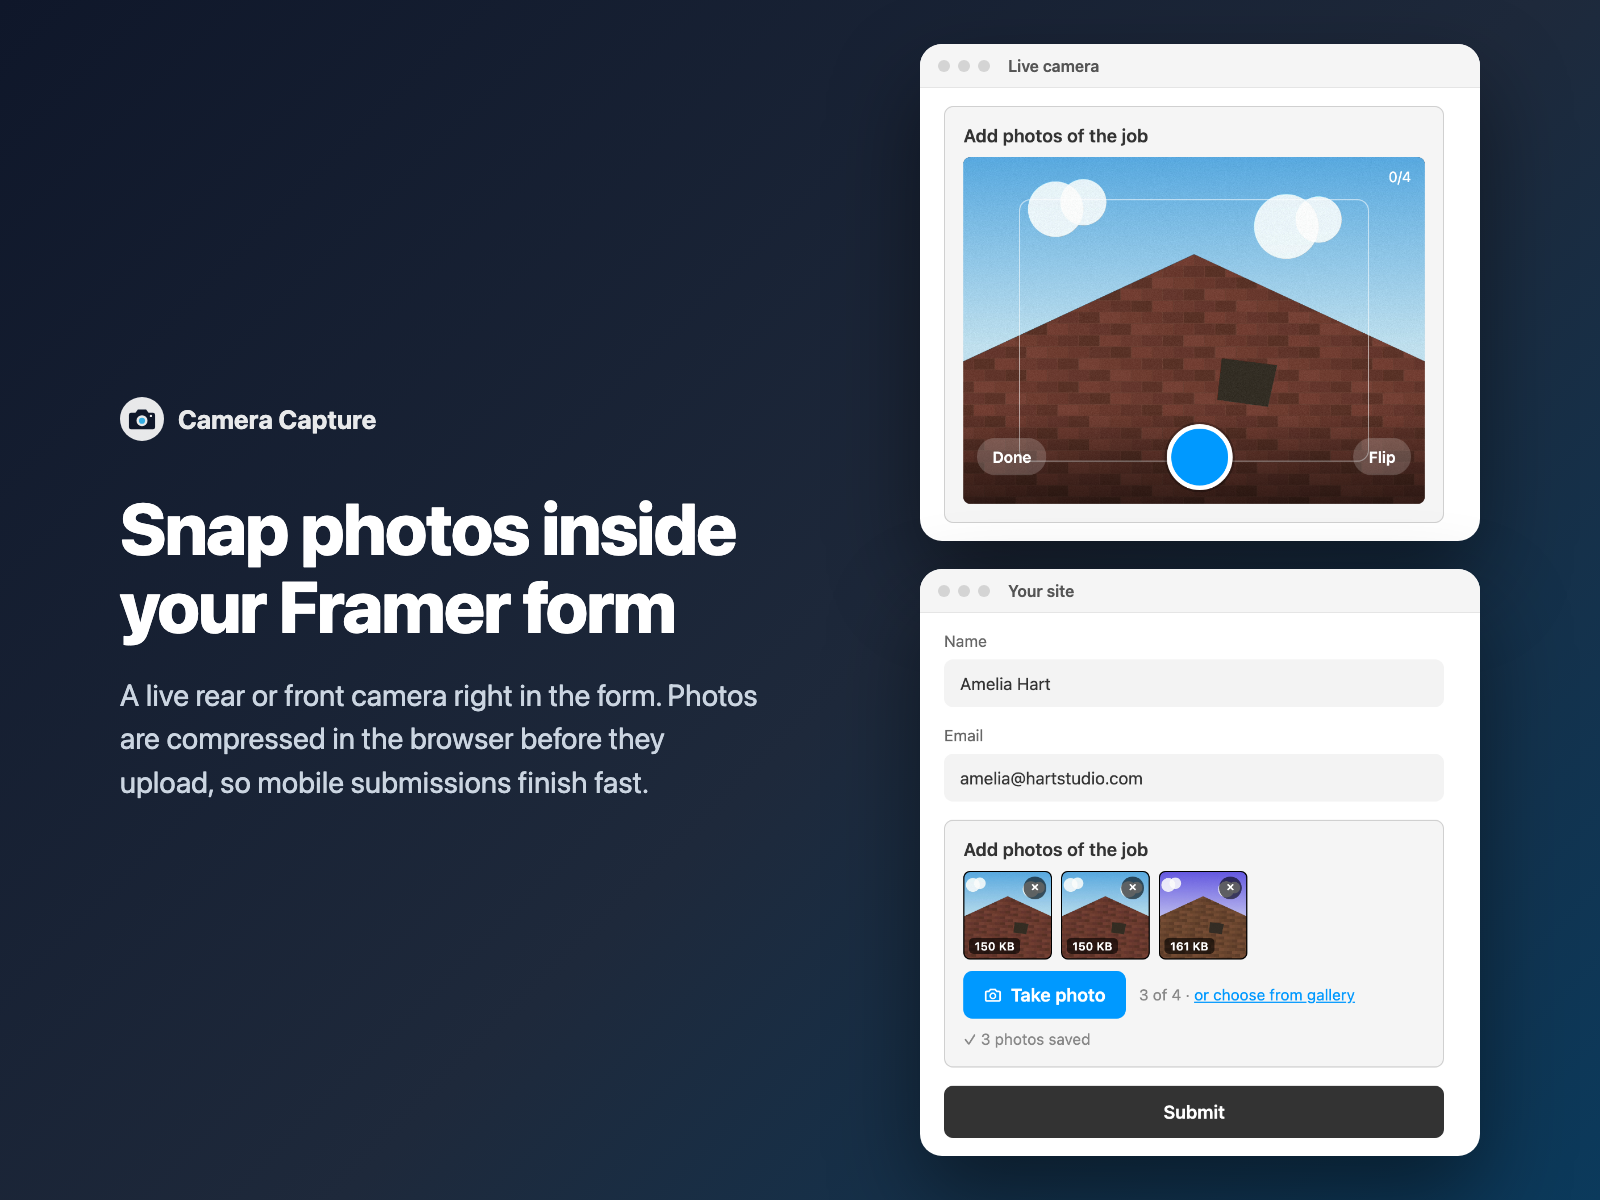
Field-service quotes, property inspections, damage claims and event check-ins all need the same thing: a photo taken on the visitor's phone, right now. Native Framer forms have no camera field, and a generic upload button sends multi-megabyte photos over a mobile connection.
Camera Capture adds a live camera viewfinder to your native Framer form, compresses each photo in the browser, and uploads it to FramerSend storage or your own bucket — the submission receives the photo links.
Why mobile photo uploads fail on standard forms
Asking for photos on mobile usually breaks in three places:
- Large files on slow connections. Modern phone cameras shoot photos of several megabytes each; sending several of them over cellular data is slow and can fail.
- Blocked or missing cameras. Visitors deny camera permission, or open your link inside an in-app browser where the camera API is not available.
- Submitting too early. If the form sends before the photos finish uploading, the lead arrives without the pictures you asked for.
A plain file input vs Camera Capture
| A plain file upload field | Camera Capture inside a native Framer form |
|---|---|
| Opens a file chooser; the visitor has to find or take the photo outside your form. | Opens a live rear or front viewfinder in the form, with a Flip button and shutter. |
| Uploads the original full-size photo. | Resizes and compresses each photo in the browser (max resolution, JPEG or WebP quality) before upload. |
| No guidance when the camera is blocked. | Shows a message and a one-tap Use my phone's camera fallback; opens the phone camera directly when no camera API exists. |
For PDFs, documents or any file type, use File Upload instead — Camera Capture is built for photos.
How Camera Capture snaps, compresses and uploads photos
Camera Capture is a code component written into your Framer project with zero external scripts:
- Live viewfinder — the camera is requested only when the visitor taps Take photo and released when the viewfinder closes. Choose the rear camera for job-site and receipt photos or the front camera for selfies (the front preview is mirrored; the saved photo is not), and visitors can tap Flip anytime.
- 1 to 6 photos — thumbnails show each photo's compressed size, with Retry for a failed upload and Delete to remove one. An optional gallery picker accepts images only.
- In-browser compression — each photo is drawn at most
maxResolutionpx on its longest side (default 1600) and encoded as JPEG or WebP at your quality (default 80%); WebP falls back to JPEG where the browser cannot encode it. Picked photos keep their orientation. - Direct upload — photos go from the visitor's browser to FramerSend storage (10 MB per photo, 1 GB total, kept 90 days) or to the AWS S3, Google Drive or Supabase Storage connected to your form. No photo bytes pass through FramerSend's servers.
- Submit validation — required, uploading and failed-upload states block the submit, including Framer's Enter key, except when the field is in a block hidden by Conditional Fields.
Add a camera field in three steps
- Select your native Form on the Framer canvas, open FramerSend Fields, and pick Camera Capture.
- Pick the FramerSend form the photos belong to (its storage is shown), then choose the Field Quote, Damage Claim or Selfie preset.
- Click Insert camera field, adjust the field name, photo limit, colors and texts in Framer's right-hand panel, and publish.
Field quotes, damage claims and selfie check-ins
The three presets match the most common photo forms:
- Field Quote — rear camera, up to 4 job-site photos, 1600 px JPEG at 80%. Pair it with Calculator for an estimate and Address Autocomplete for the job location.
- Damage Claim — rear camera, up to 6 detailed photos, 2048 px JPEG at 85%. Add Signature and Reference Number for a complete claim intake.
- Selfie — front camera with a mirrored viewfinder, 1 photo, 1024 px WebP at 80%, no gallery. Useful for event or class check-ins.
The submission contains the photo links, comma-separated, under your field name — ready for HubSpot, Airtable, Notion or your email notification.
What we tested
We ran 48 automated Playwright harness checks and 26 plugin-panel checks covering the live viewfinder (rear camera requested without audio, mirrored front camera after Flip, camera released on close), the sign → upload → complete flow, comma-separated links in photo order, delete and form reset, 4000×3000 photos resized to 1600×1200, WebP output, max-photo limits, blocked-camera and no-camera fallbacks, required and uploading validation with and without browser validation, hidden Conditional Fields blocks, failed uploads with Retry, the three presets, and own-storage size limits.
Try Camera Capture inside FramerSend Fields along with all 74 Framer form fields and 110+ connectors — 14-day free trial with no card, then from $5/month.
Frequently asked questions
Can a Framer form open the phone camera?
Yes. Camera Capture adds a live viewfinder to your native Framer form. Visitors tap Take photo, use the rear or front camera, tap Flip to switch, and snap up to 6 photos with thumbnail previews.
What if the visitor blocks camera access or opens the form in an in-app browser?
Camera Capture shows a message and a one-tap button that opens the phone's own camera (an image input with capture). Where there is no camera API at all, such as in-app browsers, Take photo opens the phone's camera directly. An optional gallery picker is also available.
Why are photos compressed before upload?
Phone photos are often several megabytes. Each shot is resized in the browser to a maximum resolution you choose (1600 px on the longest side by default) and encoded as JPEG or WebP at your quality setting (80% by default), so uploads finish faster on mobile connections.
Where are the captured photos stored?
In FramerSend storage by default (up to 10 MB per photo, 1 GB total, kept 90 days), or in the AWS S3, Google Drive or Supabase Storage connected to your form. The submission contains the photo links, comma-separated, under the field name you choose.
Can I make photos required?
Yes. A required camera field blocks the submit until a photo is added, and the form also waits while photos are uploading or after a failed upload. If the field sits in a block hidden by Conditional Fields, the form sends normally.
Where do I install Camera Capture for Framer?
Open FramerSend Fields on the Framer Marketplace (74 fields in one plugin) and select Camera Capture. Every FramerSend plan includes it from $5/month after a 14-day free trial with no card.
Connect Framer to 100+ CRMs in 60 seconds
14-day free trial, no card needed. Copy your Submit URL and paste straight into Framer.
Related Articles
How to Connect Framer Forms to Any CRM in 2026 (No Code & No Zapier)
A complete step-by-step tutorial on routing native Framer form submissions directly into Klaviyo, HubSpot, Mailchimp, or Salesforce in under 60 seconds.
Framer Form Not Sending? 9 Fixes for Submissions That Never Arrive
Framer form not sending or submissions not arriving? Work through 9 fixes: publishing, Send To settings, validation, spam filters, webhooks and field names.
How to Show Personalized Quiz Results and Outcome Cards in Native Framer Forms
Turn Quiz Score totals, Calculator quotes and dropdown answers into tailored result cards with their own badge, headline and CTA — inside native Framer forms.